
-
Add about 120g (¾ cup) of the mixed seeds and knead them into the dough until evenly distributed.
-
Transfer the bread to a lightly oiled surface and knead it gently, forming it into a log that comfortably fits into the 2lb/900g loaf tin. Transfer the dough into the tin (seam side down) and gently press it down to even out the top.Tip: This recipe works really well with just a single rise. But, if you want to do two rounds of rising, first place the dough into a lightly oiled bowl, cover it with a tea towel and allow to rise in a warm place for about 1 hour or until doubled in volume. Then proceed with this step.
-
Lightly cover with cling film and allow to rise in a warm place for 1 hour 15 minutes – 1 hour 30 minutes or until approximately doubled in volume.
-
While the bread is proofing, adjust the oven rack to the middle position, place a baking tray on the bottom rack of the oven, and pre-heat the oven to 480ºF (250ºC).
-
Once risen, lightly brush the top of the bread with egg wash and sprinkle with the remaining seeds.
Tip: If you want the bread to be vegan, brush it with a bit of water instead, before sprinkling on the seeds. To make sure that the seeds stick better, you could add a bit of sugar or maple syrup into the water.
-
Place the proofed bread into the oven on the middle rack, pour boiling hot water into the bottom baking tray, spray the bread 4-5 times with water (optional), and close the oven door.
-
Bake at 480ºF (250ºC) with steam for 15 minutes – don’t open the oven doors during this initial period, as that would allow the steam to escape out of the oven.
-
After the 15 minutes, remove the bottom tray with water from the oven, reduce the oven temperature to 430ºF (220ºC), and bake for a further 60-70 minutes in a steam-free environment. The final loaf should be of a golden brown colour. If the loaf starts browning too quickly, cover with a piece of aluminium foil, shiny side up, and continue baking until done.

Tip: If you don’t like your bread to be moist, I recommend you remove the loaf from the baking tin and bake it directly on the oven rack for the last 15 minutes (keeping the top covered with aluminium foil, shiny side up). This will help dry out the middle of the loaf even more – just note that this will also further crisp up and dry out the crust.
-
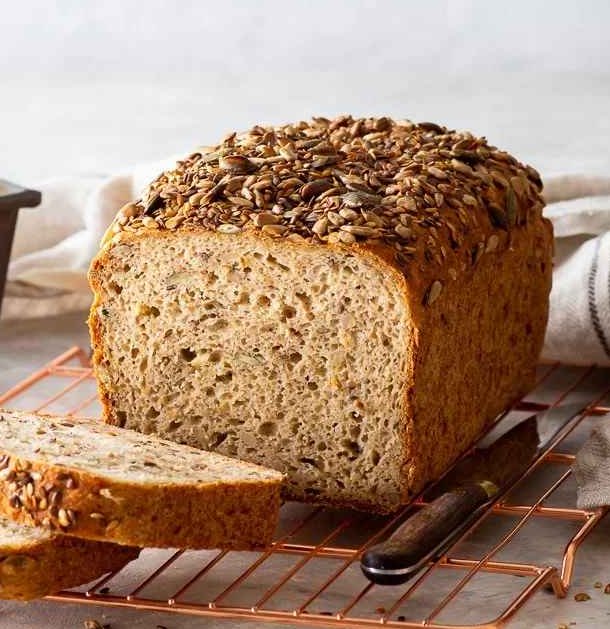
Remove the baked loaf out of the baking tin immediately out of the oven and transfer it onto a wire cooling rack to cool completely before cutting into it.
-
Storage: The gluten free bread keeps well wrapped in a tea towel in a cool dry place for 3 – 4 days.
NOTES
POSSIBLE SUBSTITUTIONS
- Active dried yeast: You can use instant yeast, in which case you don’t need to activate it, but just add it straight to the dry ingredients along with the sugar. Add the water that would be used in activating the active dried yeast to the dry ingredients along with the psyllium gel and apple cider vinegar.
- Apple cider vinegar: You can use other types of vinegar, although I recommend sticking to apple cider vinegar if at all possible.
- Psyllium husk: YOU CAN’T SUBSTITUTE IT WITH A DIFFERENT INGREDIENT. But, if you use psyllium husk powder as opposed to the rough husk form, use only 75-85% of the weight listed in the recipe.
- Buckwheat flour: You can use white teff flour, sorghum flour or oat flour instead.
- Tapioca starch: You can use corn starch, potato starch or arrowroot starch instead.
- Millet flour: You can use brown rice flour instead.
NOTE: All substitutions should be made by weight not by volume.
